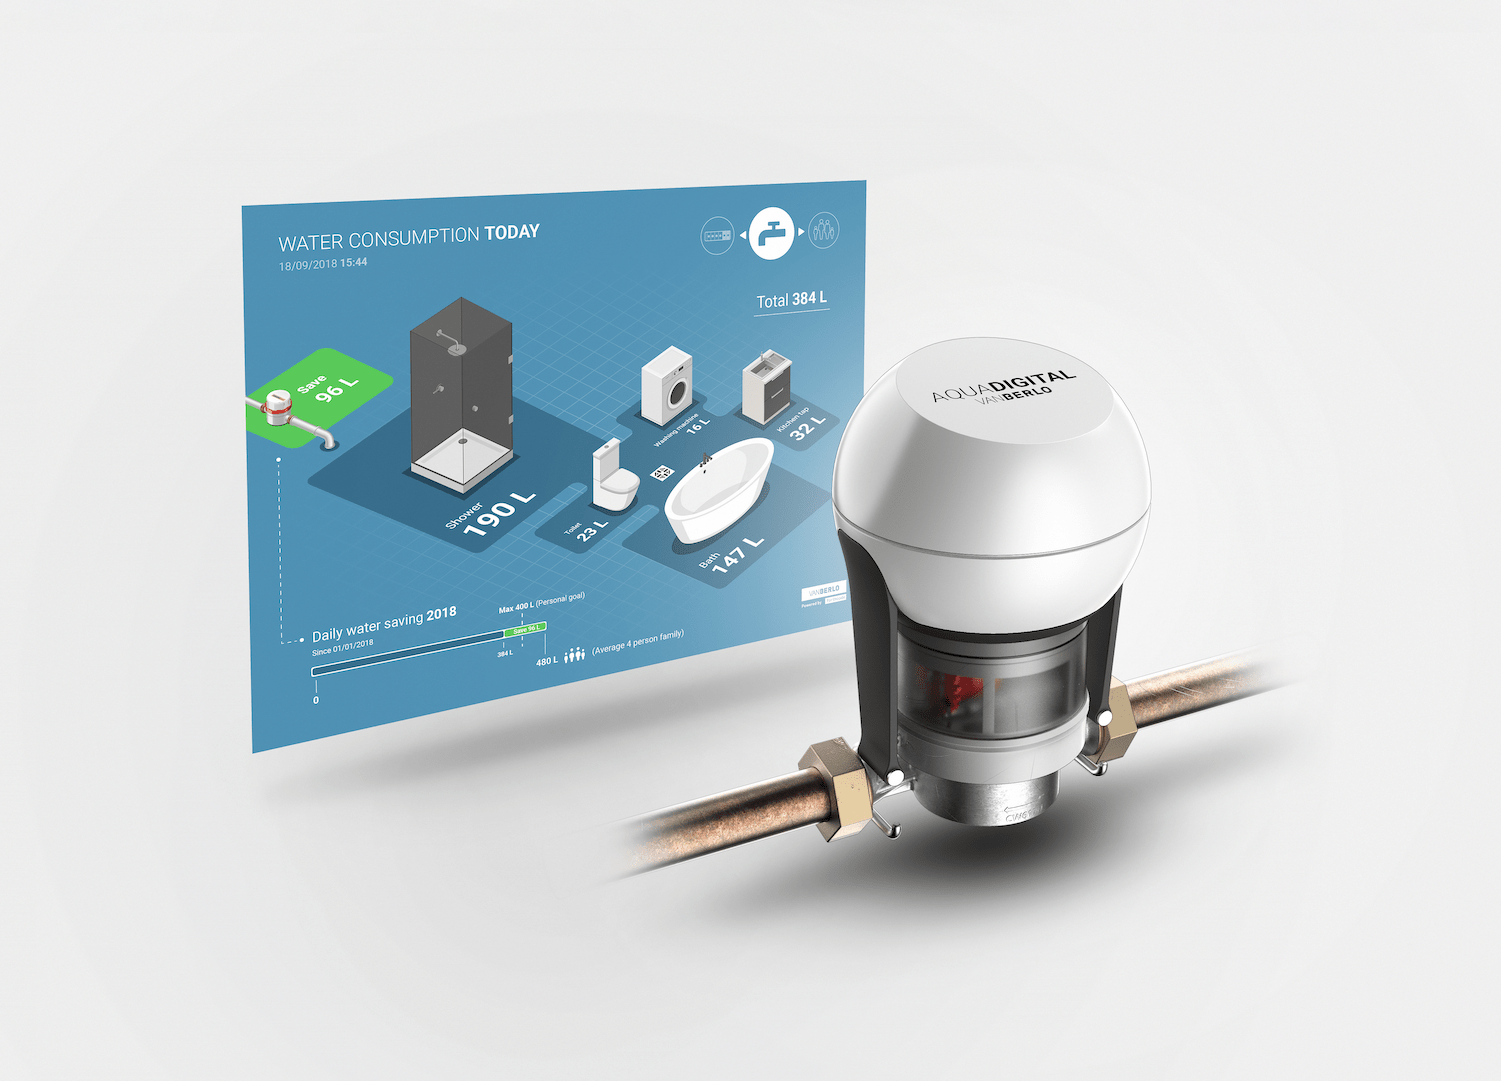
AquaDigital is a retrofit device to make any water meter smart within minutes. It uses machine learning to recognise the current water meter reading. Because many households already have a water meter installed, it would be costly to replace them with new, smart water meters. That's why we developed AquaDigital.
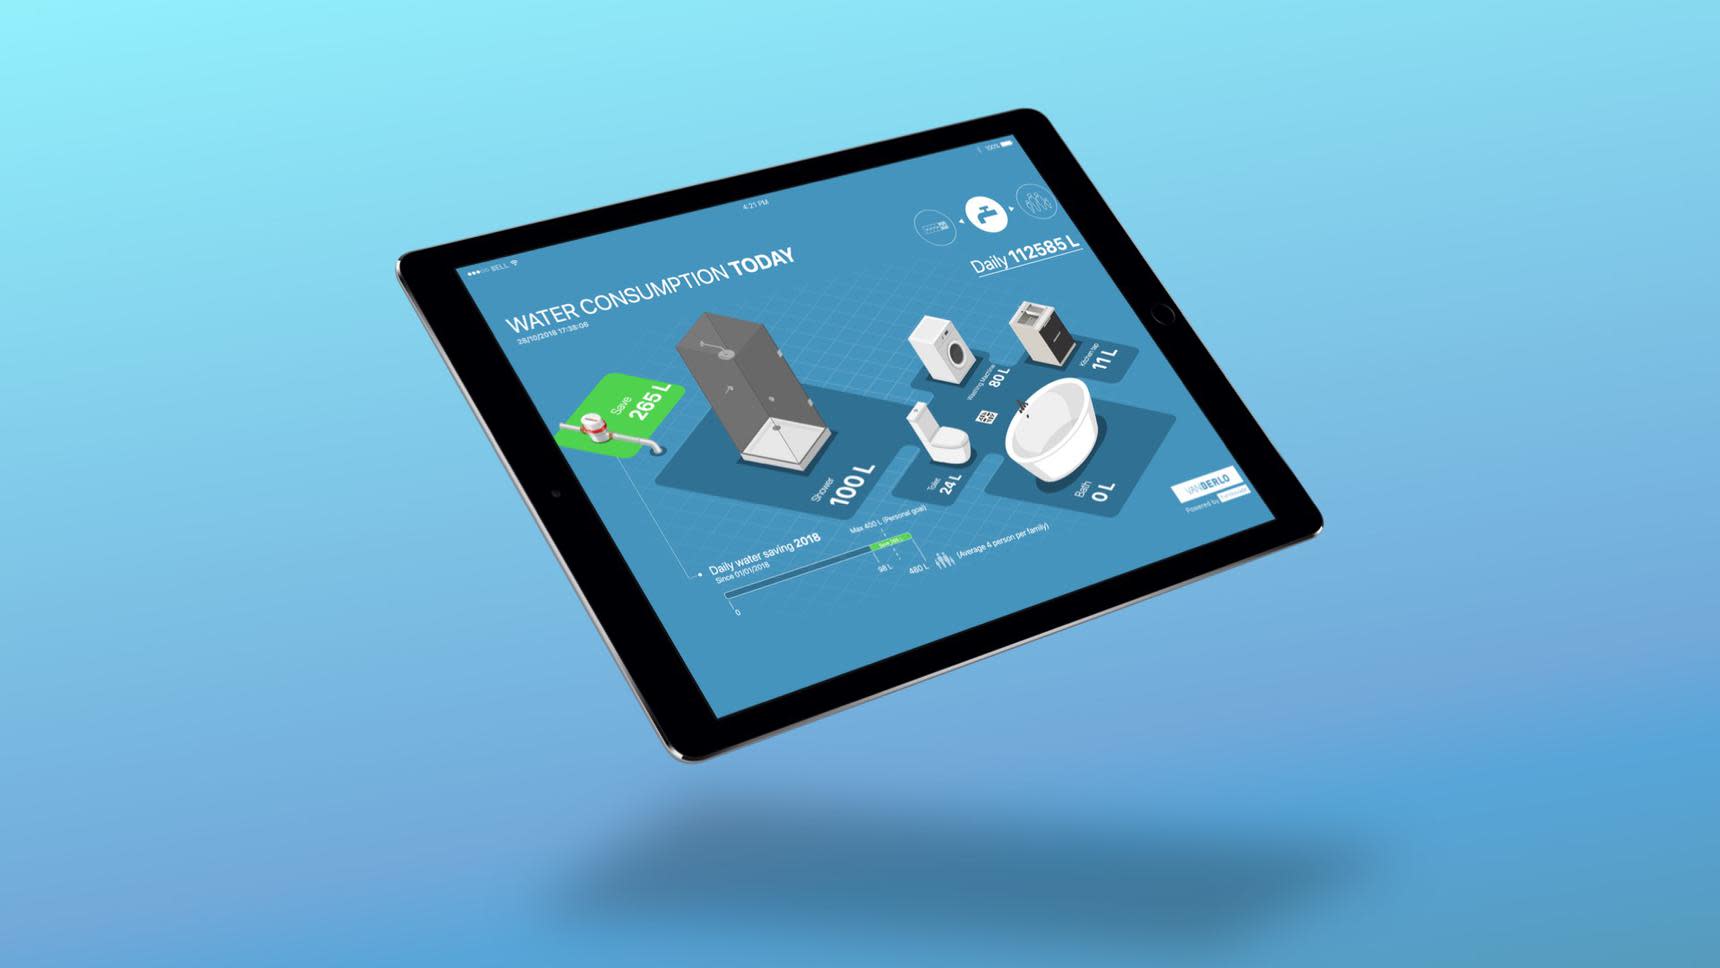
The benefits of a smart water meter are probably not immediately clear to its users. So Thomas, Matthijs and I designed and built an interface to show useful data to the user. We want to drive users to use less water each day by showing real goals and possible improvements.
To get the necessary data, we have to read the value of the water meter periodically. The functional requirements for AquaDigital are:
the device takes a picture of the water meter
it sends that to a processing server to analyze the image and get the current water usage
the value is stored in a database with the user's history
we interpret the data and figure out which device used all that water
As you can see, there are a lot of moving parts in this project, and it should all feel like one cohesive experience. Working on the Aquadigital project, required many different skills. From physical product design to implementing machine learning algorithms to prototyping electronics. Ultimately, we made three prototypes. The first of which was to determine whether our idea was feasible. The second prototype more closely resembles a product that we could actually sell. We built the last one to become a demonstrator, that was displayed at the Dutch Design Week in October 2018.
Proof of concept
At first, we weren't even sure it would be possible to read the numbers from a photo of the water meter. When Eric, our project lead, asked if it was possible we told him we had not done this before. Felix and I said we would try, but couldn't promise anything yet.
Our first step, take a picture of a water meter and get cracking with several analysis tools. So, we walked into the power closet where the office water meter was situated and took a picture with our phone.
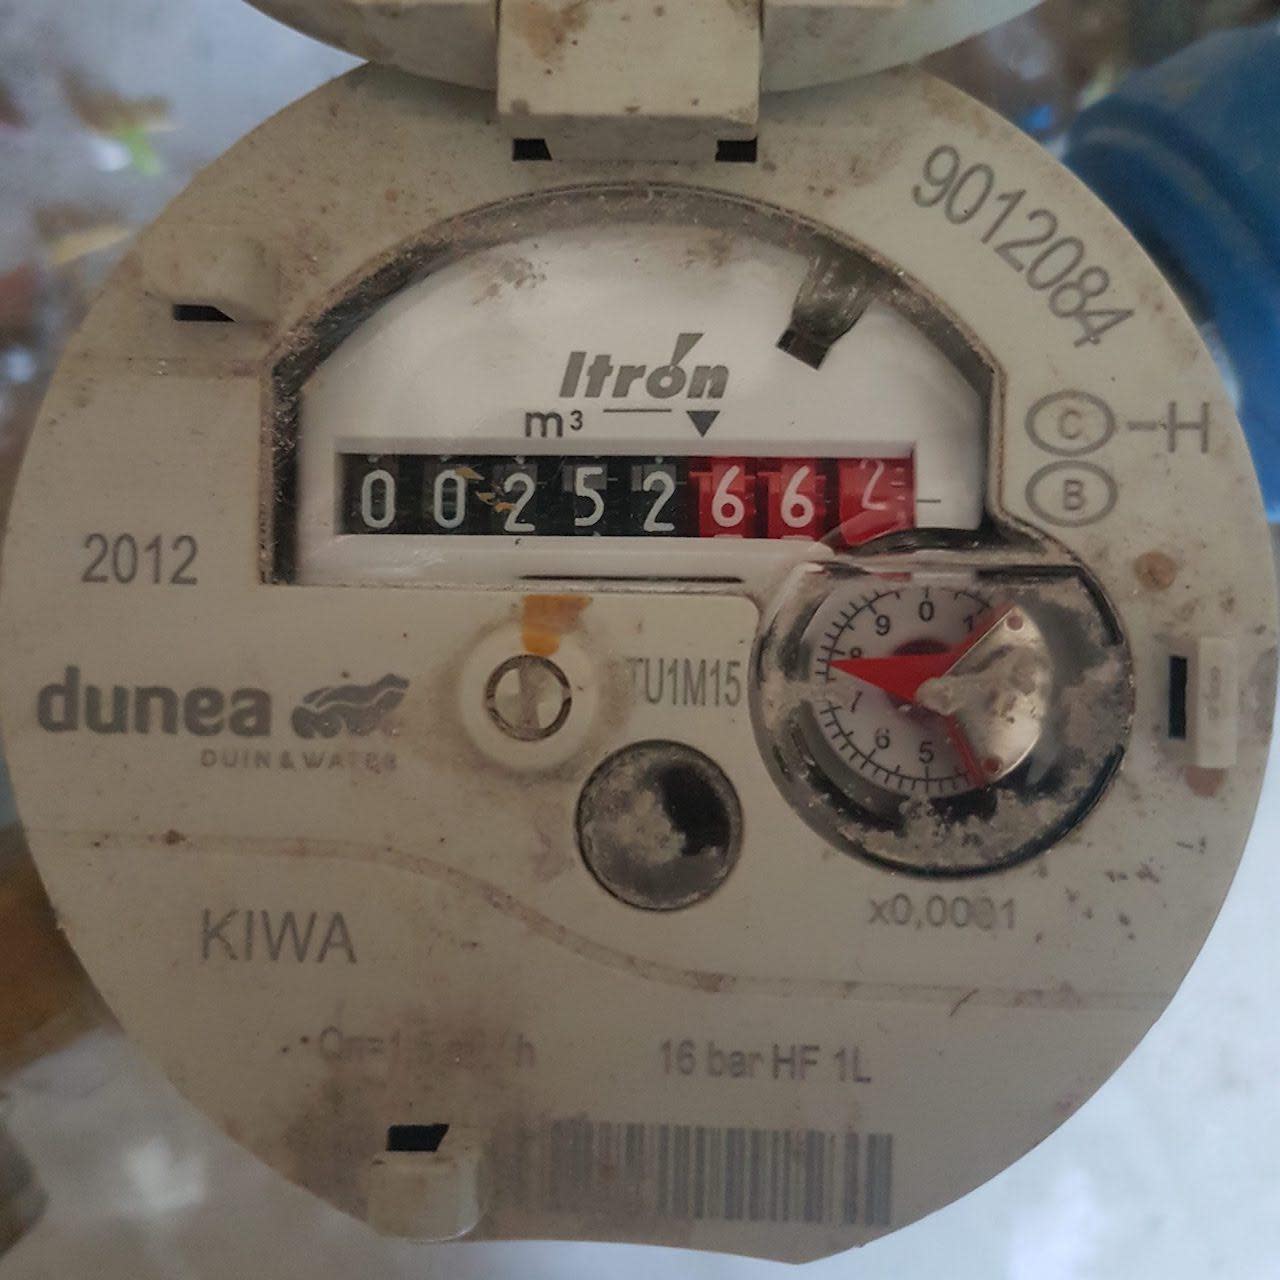
Python is generally used for these kinds of problems, quite easy to work with and there are a lot of libraries available to help us, so that's what we worked with. There are several OCR (optical character recognition libraries) available for Python, but all of them require black on white text. OpenCV is built to manipulate images programmatically, which we used to get our text looking right. After playing with brightness, a posterization effect and several thresholds, we had an image that our OCR could work with. Our first step was a success!
Hardware
As we wanted to automate the process of taking pictures, we had to build a small device to put on top of the water meter. This complicates a few things, like lighting, connectivity, and mounting.
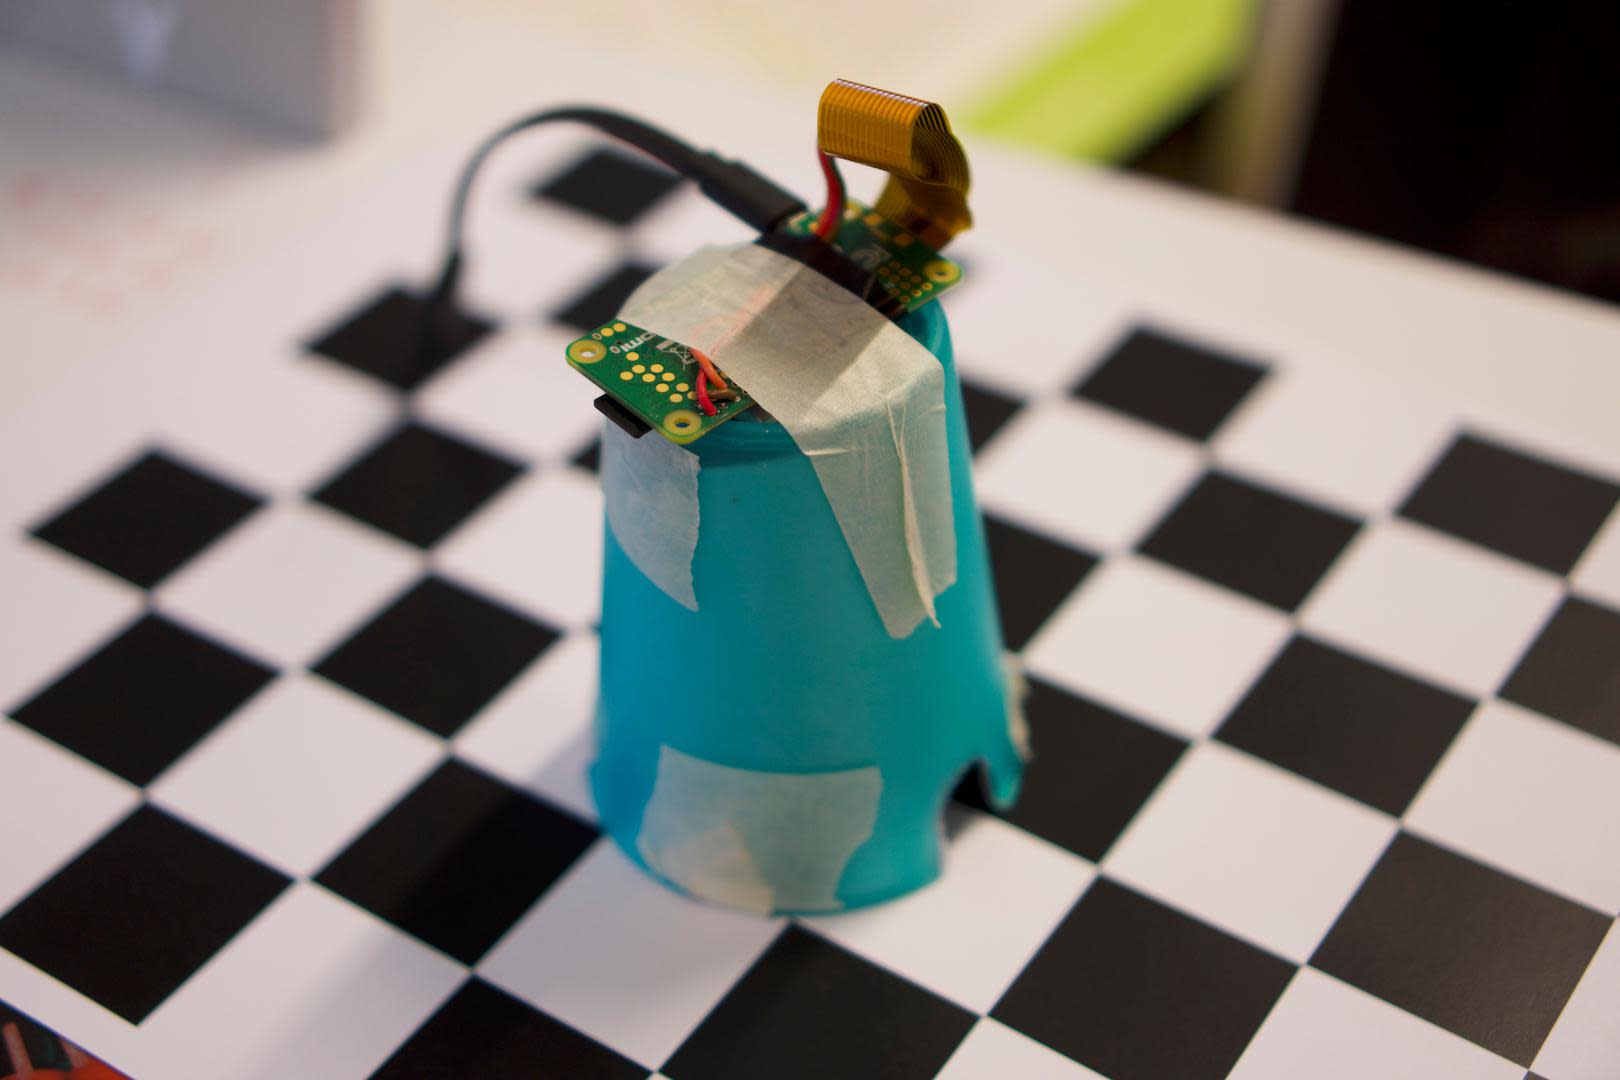
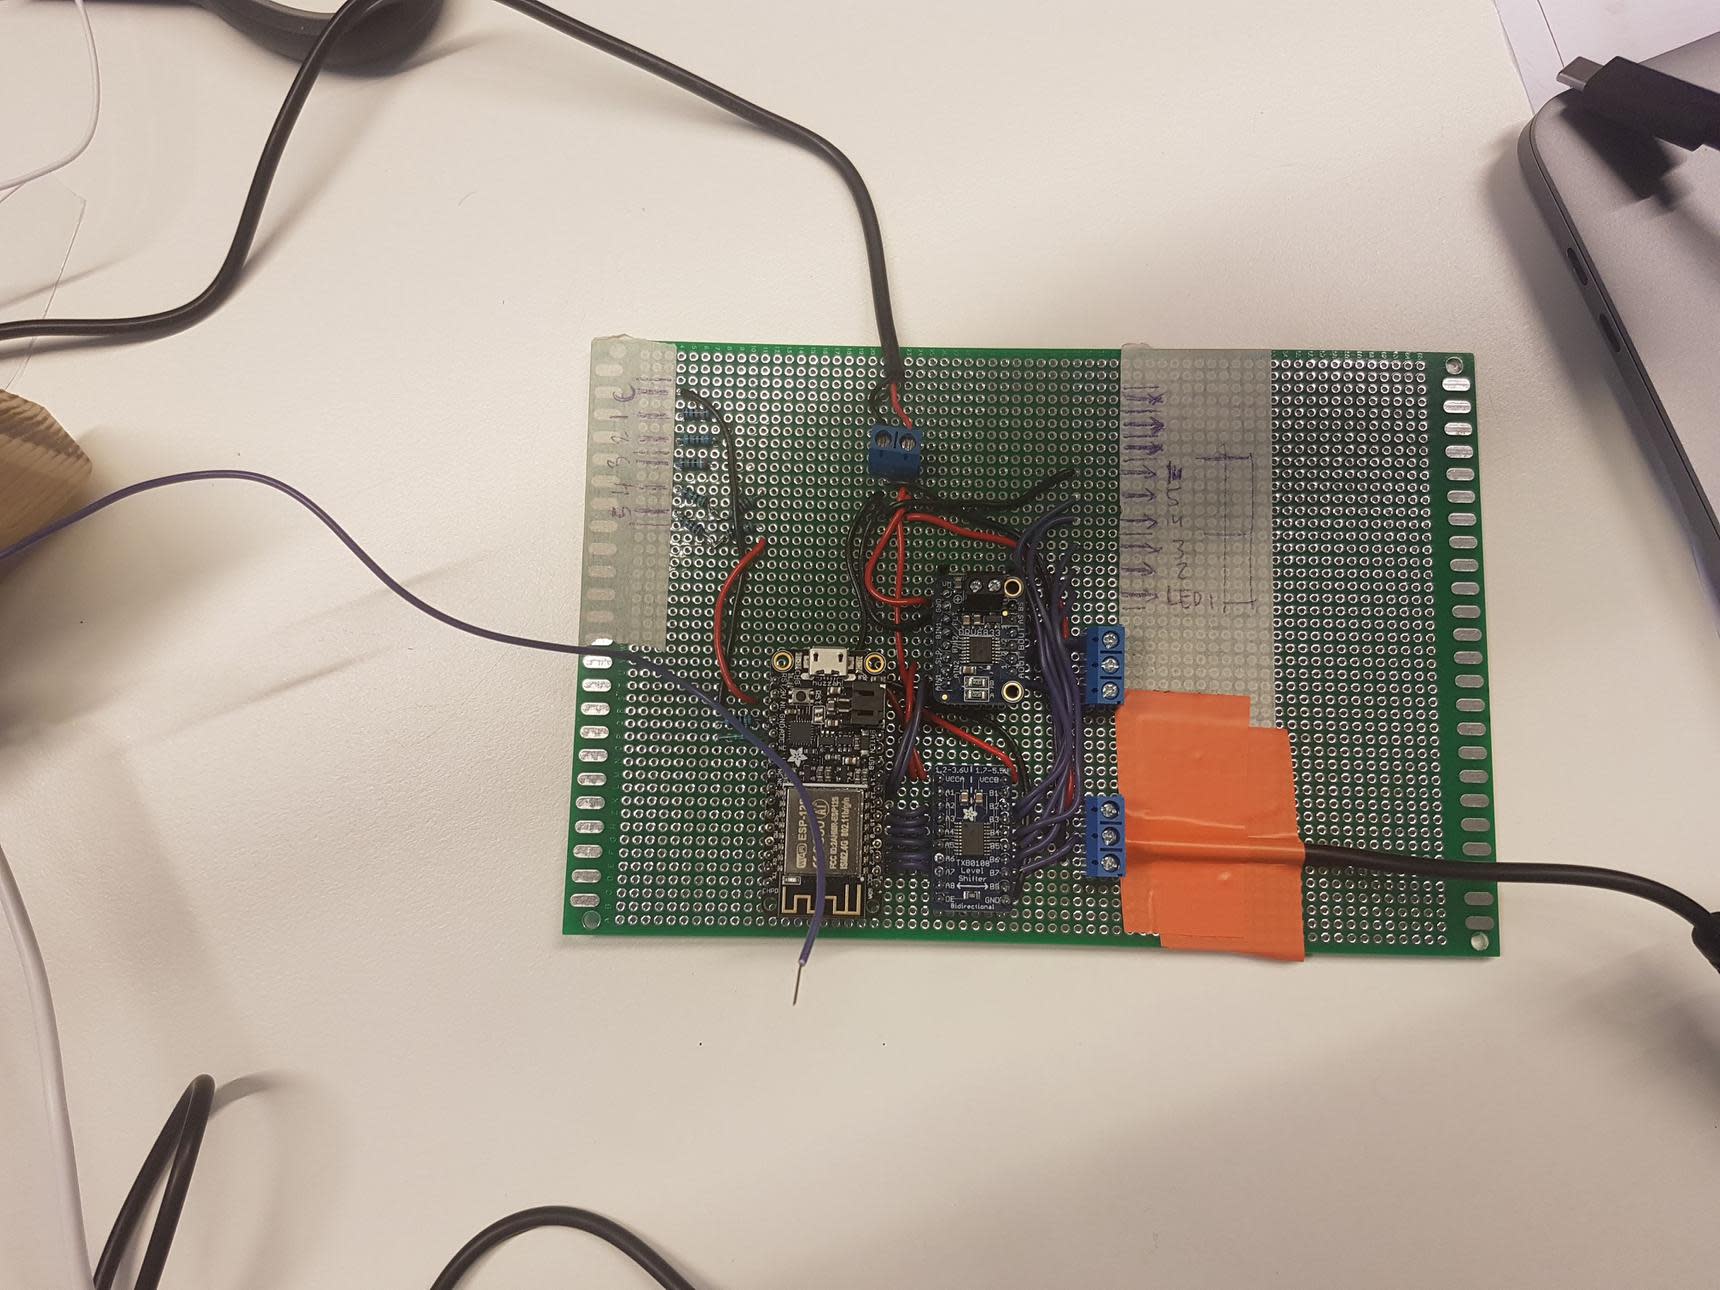
The first hardware prototype was built with a plastic cup, some white paper, aluminum foil and a Raspberry Pi with a camera module and LED ring. The LED Ring showed very hard lighting on the surface of the water meter, causing glare in the images. We used a diffuser (white paper) and a reflector (aluminum foil) to ensure even lighting across the image. The raspberry pi is running a very similar program to the one we used before. The biggest difference being that it is now also uploading the photos to Firebase, which we used as an easy database to store images and meter data. We then built a basic interface to tag the images and correct incorrect readings, to improve the character recognition algorithm.
Second prototype
We built a second prototype to improve on the first in several ways. It was supposed to be a lot smaller and should resemble the product sketches Tom (another product design intern) had made previously.
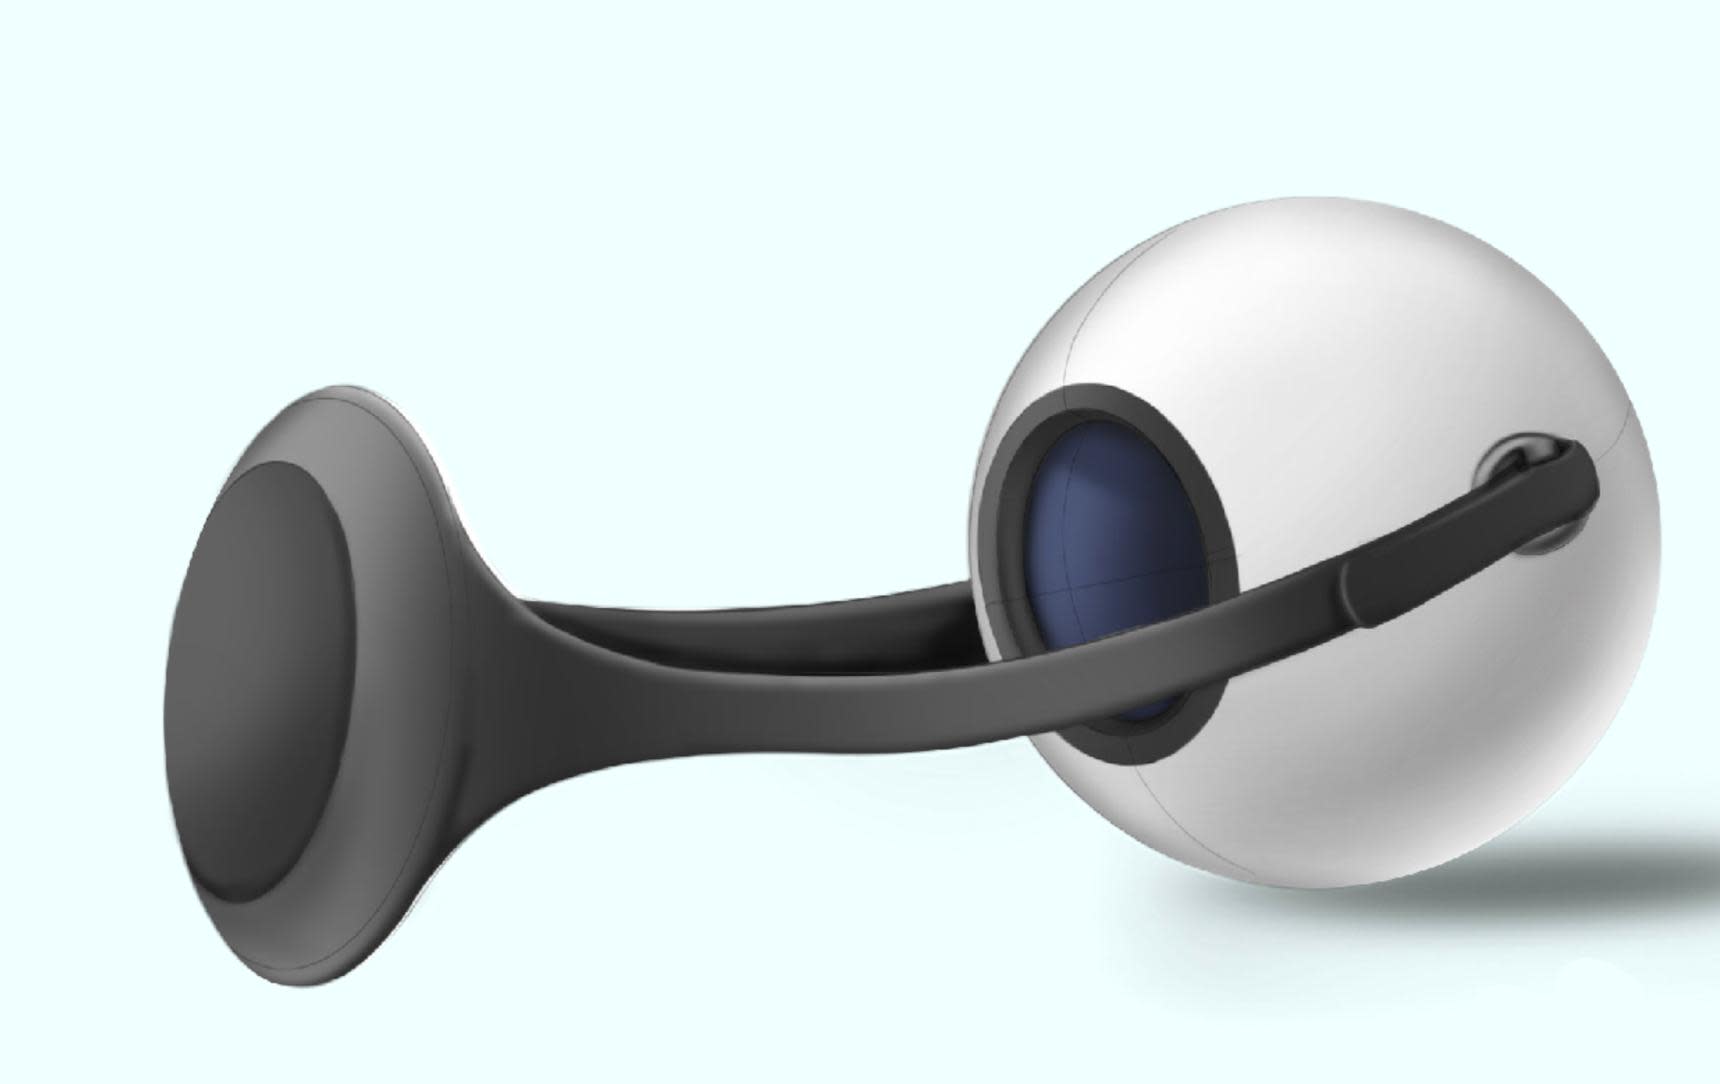
The product had to get a lot shorter than our first prototype, which meant we had a few challenges ahead to maintain a clean image of the entire water meter. We tested a few lenses and settled on an ultra-wide angle iPhone lens from HEMA. After we were satisfied with our choice, I modeled and 3D printed a custom housing. This did create multiple new problems though.
The edges of the lens were a little blurry, and lighting was heavily impacted by the lens, as it was obstructing the LED ring from evenly lighting the surface of the water meter. Fixing it in hardware would be a slow fix, so we decided to solve it with better software. We corrected the lens distortion (using OpenCV) and improved the algorithm even further. We were now using machine learning (ML) through Google's open source Tensorflow framework.
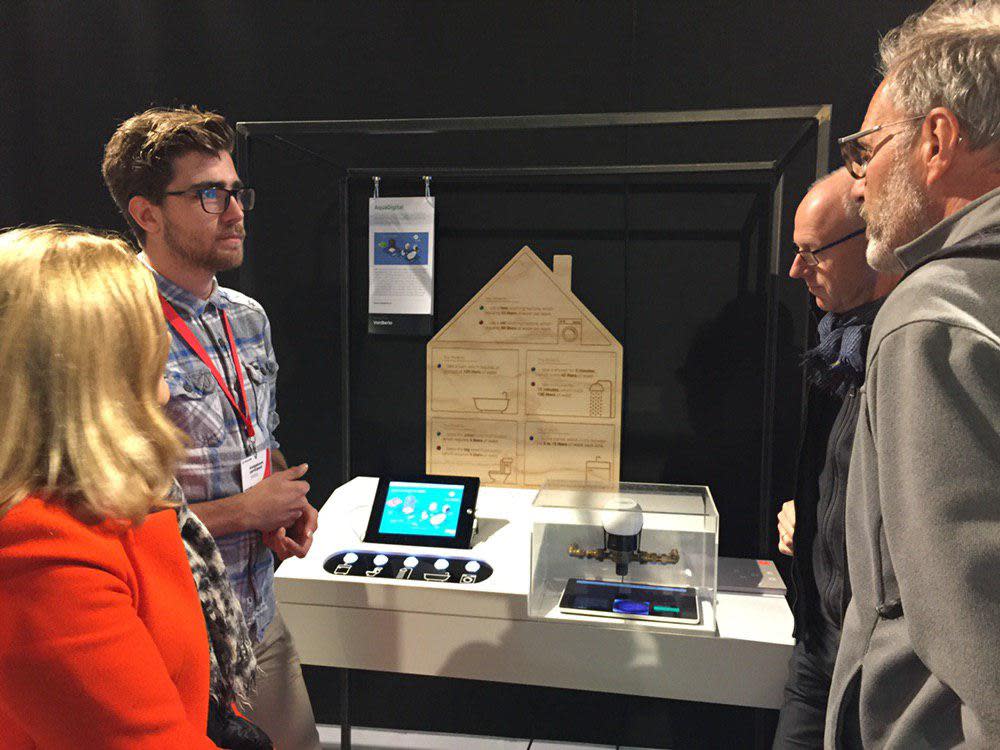
Demonstrator
Eric was showing more and more excitement as the project moved along. When we got word that we were going to show AquaDigital at the Dutch Design Week, it was now clear we had to build a demonstrator, to show what the project was all about to the general public.
Designing an interface to influence users' behaviour
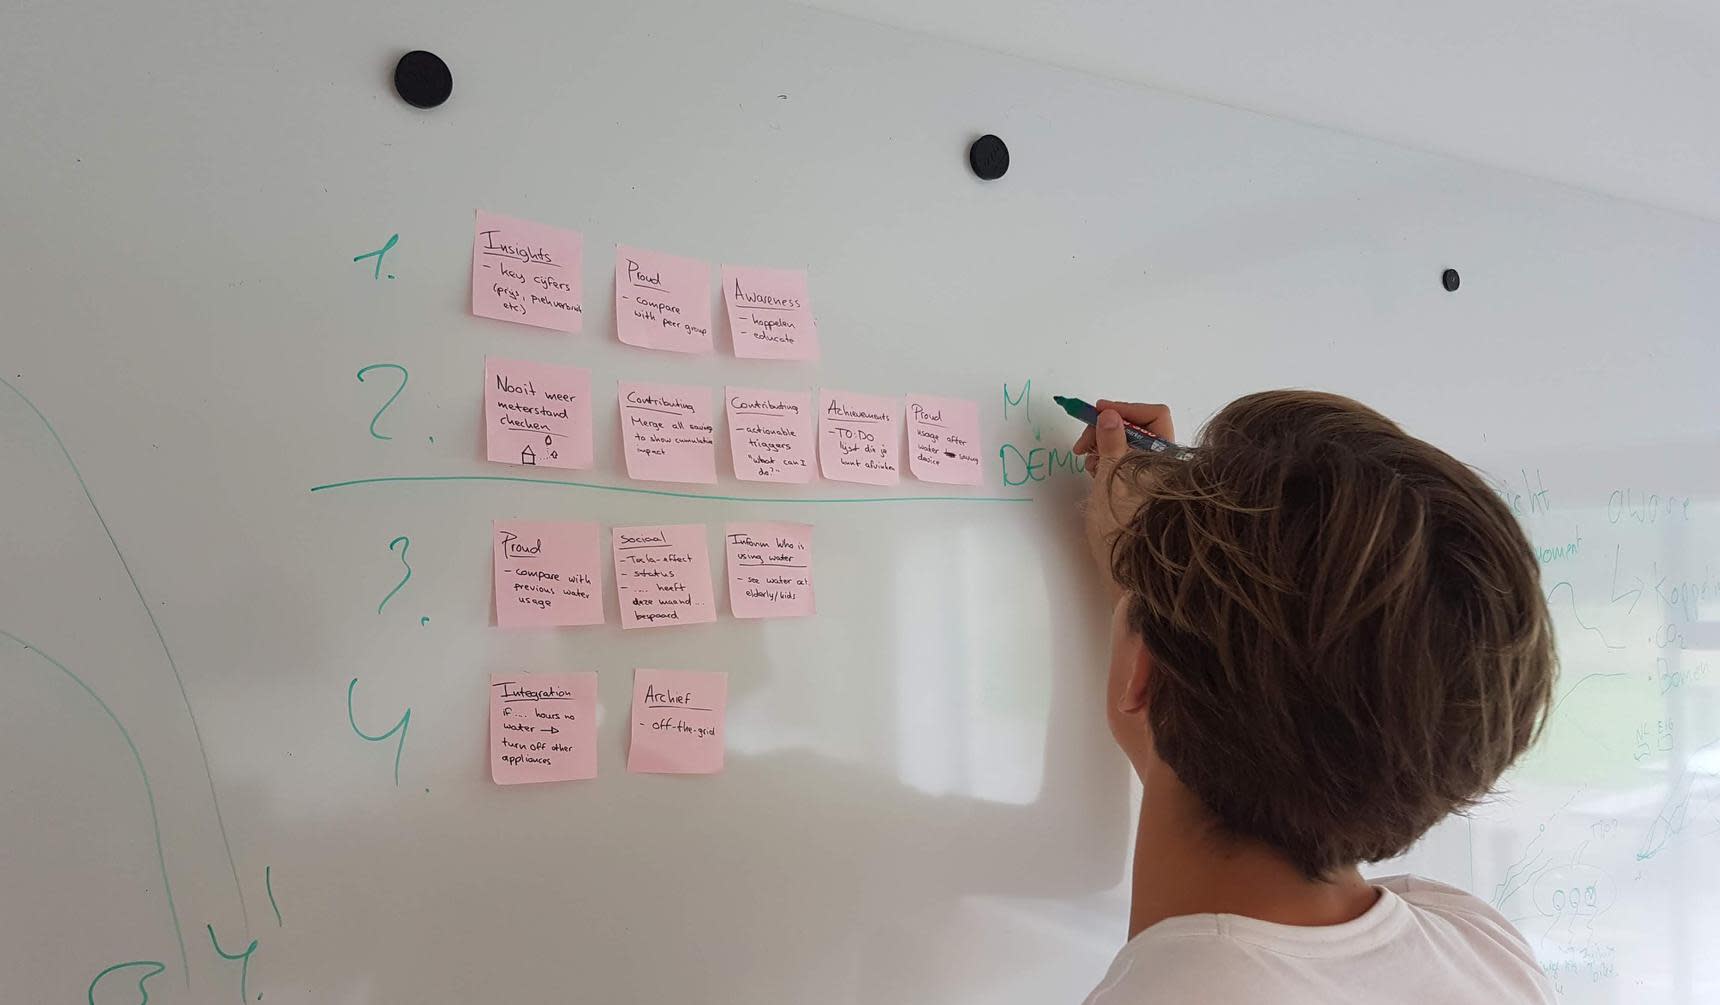
To ensure the water meter would have the desired impact on people's water consumption, we had to think about compelling ways to attract users to decrease their water usage. Knowing when you're using a lot of water is only half of the problem, knowing what to actually do about it is a whole different story entirely. To increase the cultural impact the AquaDigital could have, we created an interface that makes it super clear what to do to decrease your water usage. You can play with the interface here.
Assembly
During final assembly of the demonstrator, I've learned miscommunications happen very easily. As I had worked on the first versions of the hardware prototype, I had put a lot of effort into getting a clear image to process. Because there were a lot of people working on the project, this was easily forgotten. Upon receiving the final prototype for the demonstrator, we were thrilled by how it looked, it was almost like a production quality part (nice ✨). However, we quickly found out the inside wasn't as similar to our prototypes as we had previously thought. There was no reflector on the inside, which caused the images to be filled with nasty reflections. That resulted in a lot of erroneous readings. Having only a few days left, we didn't have many options to fix the problem. We created a new middle layer with fewer obstructions, made the inside reflective again. That fixed most of our issues.
Now that our project was up and running, we had to get the demonstrator itself built. Thomas and Matthijs designed a box that would hold the water meter, an iPad and a small house, that shows which button is pressed, and how much water it uses. This involved some Arduino work and electronics design which I picked up from Eric when he had more urgent projects to handle.
The demonstrator now being finished, it was time to move it to Eindhoven and set it up at the Klokgebouw for the Dutch Design Week. Once it was there, I quickly recorded a few videos to explain AquaDigital, because several VanBerlo employees would have to represent it during the DDW.
During the DDW I was at the stand for one day. Most people were excited about the project, my parents came over to see what I had worked on too, so that was a really fun way to close off the project for me.
Results and learnings
The Aquadigital project showed me the importance of the story. The project quickly transformed from something that is highly specific, to something I could see in almost every household. We used several tools and a programming language that were mostly new to us to get the project as far as we had. All in all, I learned a lot. On technical and social aspects.